Java Overview
Introduction
Java is a robust programming language and with it, you can develop mobile applications, chat bots, web applications, games, scientific applications, among many other things. While most programming languages are not “owned” by any company or person, Java beaks that rule. Java is owned by Oracle but originally developed at Sun Microsystems by James Gosling. It was first released in 1995, and later acquired when Sun Microsystems was acquired by Oracle in 2009.
Students are often most interested in using Java for Android development - it is one of the few languages you can use to create mobile applications on the Android operating system.


Visual Studio Code
We will be using Visual Studio Code in this class to write code. You can theoretically write code in Notepad, Outlook, or even Microsoft Word… but none of these will tell you if your code works. Just like Outlook should edit text for emails, and Microsoft Word should edit text for an English paper, Visual Studio Code should edit text of a program. However, it can do even more - it also can help your figure out errors in your code and see its output. This makes Visual Studio Code an integrated development environment, also known as an IDE. There any many IDE’s out there, but Visual Studio Code is used often in industy, so it is helpful to you to learn it’s tricks.
Some IDEs can be used with a variety of different languages (VS Code and Eclipse are two), and some IDEs specialize in a particular language (IntelliJ). While IDEs certainly help making writing and testing code easier, they are not always needed to write code. You’ll see how this works in CS102 and beyond.
Downloading Java & VS Code
We covered how to download Java in the first day of class, but in case you missed it, follow this link: Java for VS Code and click “Install the Coding Pack for Java” with your respective operating system.
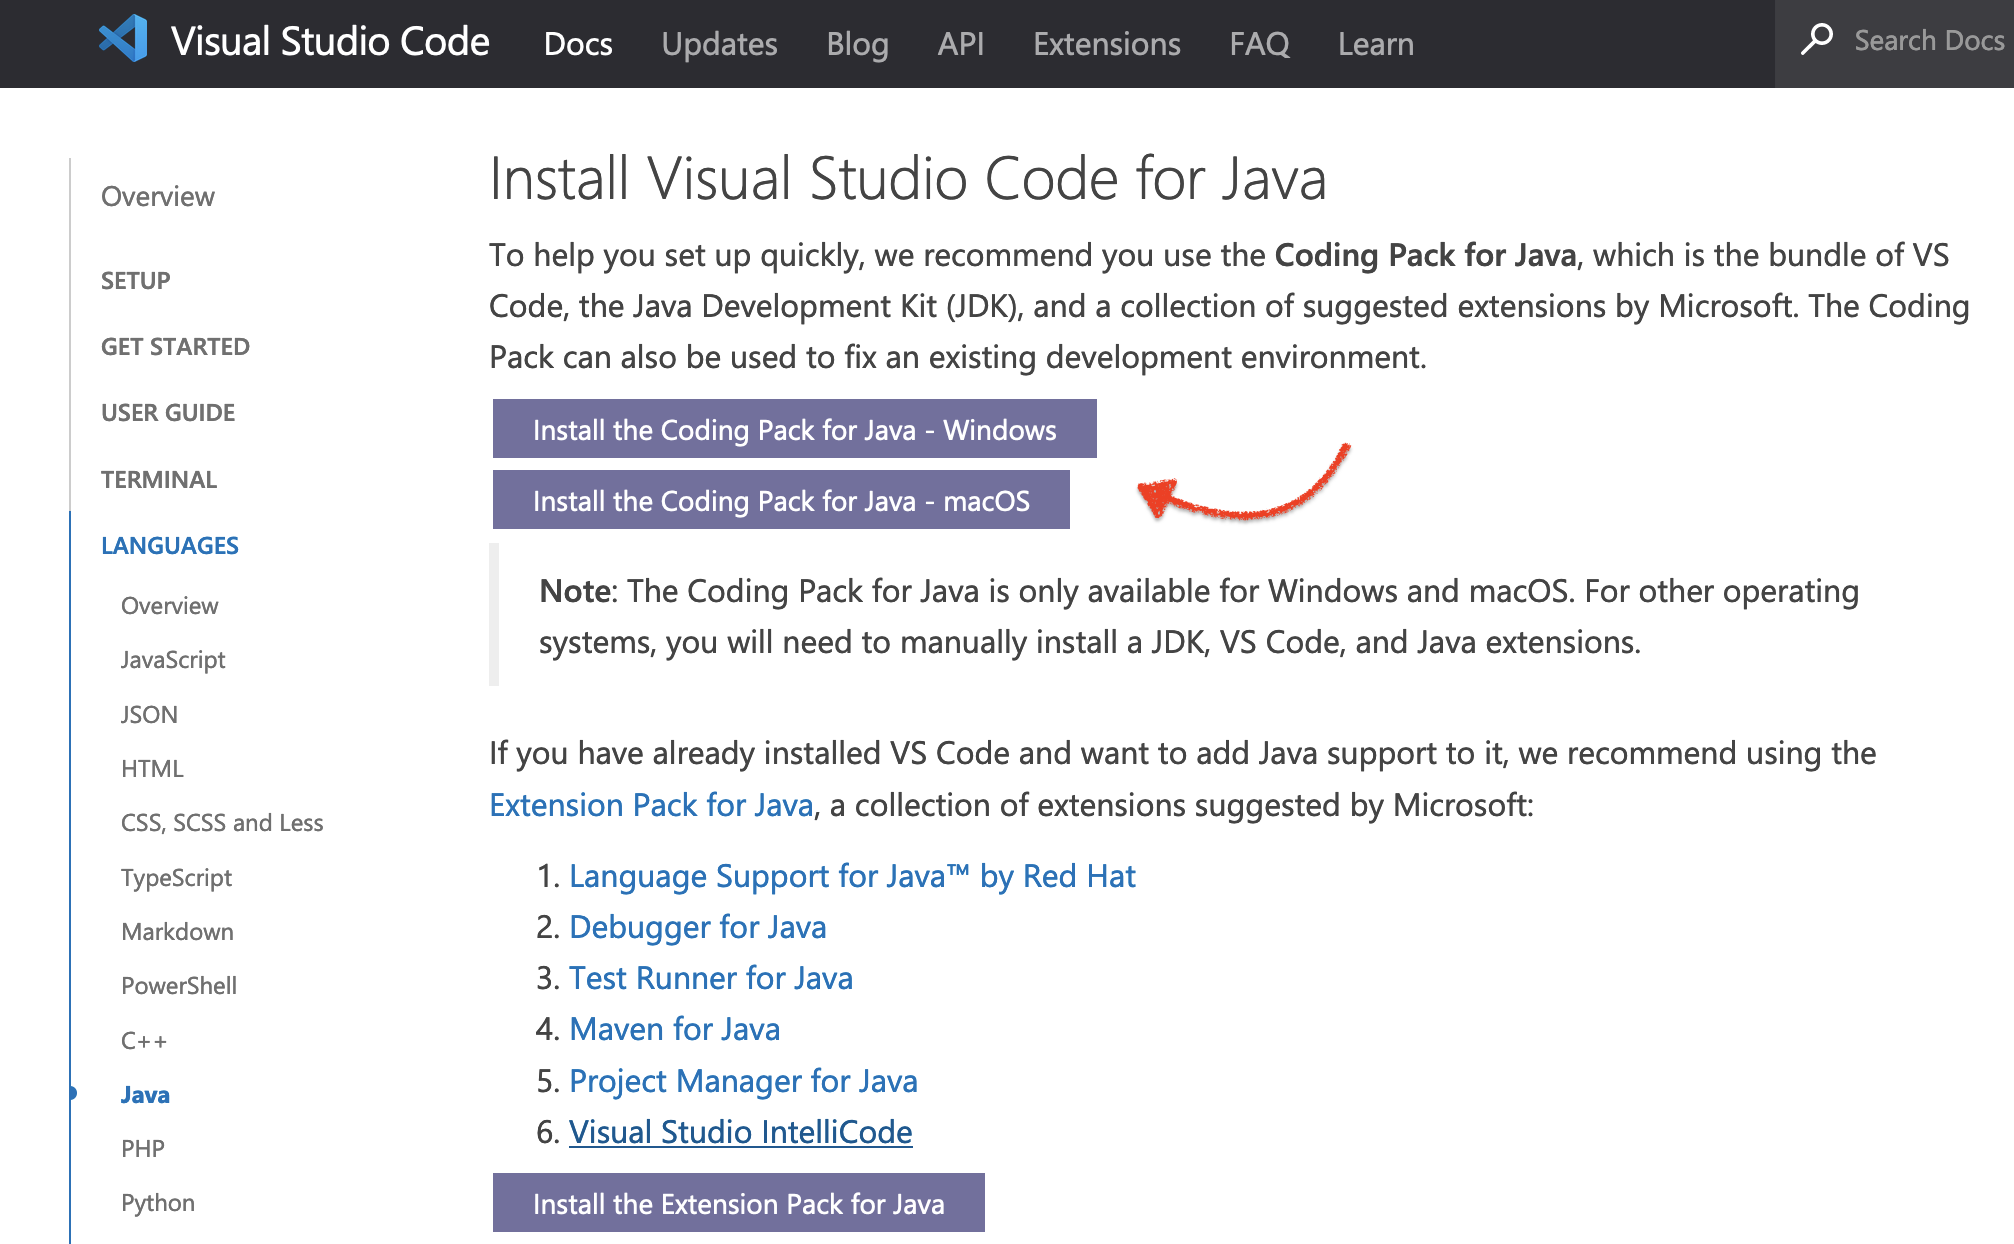
This downloads Java itself, VS Code, and extensions in VS Code for Java. Often, students need to restart their computer after the download to have all the extensions work properly.
Writing Your First Program in VS Code
Setting Up VS Code
Now it’s time to write your first program! We will write a program called “Hello.java”. There is a copy of this in the Modules, but I highly recommend you write it from scratch, instead of downloading the program.
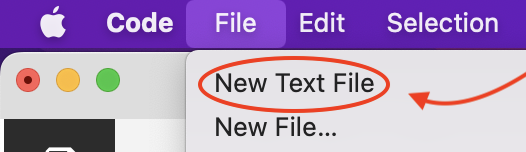
First, open VS Code and click File > New Text File. (Not New File)
You should see an area to type text that automatically numbers each line. We also need to see our output. This will be viewed in the “terminal” window (not “output” - that’s a misnomer in our case). If the text area fills your entire screen, you can either drag the terminal window up from the bottom, press the “toggle panel” button in the top right corner, or click View -> Terminal.
The image below shows the “toggle panel” button.

And the image below shows finding the Terminal view through the menu.

Once you have a Terminal view up, your VS Code views should look like this:

In the “Terminal” window, you will also see other tabs - most likely “Problems”, “Output”, and “Debug Console”. I have “Jupyter” here as well from downloading other extensions. Make sure that “Terminal” is the tab selected. “ccrumpto@itstaff-mbp-2” located in the terminal view in the screenshot above is my username and computer name. Your screen will be replaced with your username and computer name, respectively.
Writing Java Code
Now that we have VS Code ready, it’s time to get coding!
Java Main Skeleton
Nearly all of our Java program we write in this class will have the same “skeleton” so to speak. You will write these lines over and over again - they will not change from program to program.
The first two lines of our main program will always be the same -
class NameOfProgramHere {
    public static void main(String[] args) {

    }
}
“NameOfProgramHere” is substituted for the name of your program. It is also called the “class name” since it comes after the keyword “class”. It must be one word, and by Java convention, it is CamelCase. CamelCase is a naming convention where the first letter of every word is capitalized and no spaces are used. In comparison, another naming convention called snake_case uses underscores instead of spaces, and all words are lowercase.
Also notice that every open curly brace must have a corresponding closing curly brace.
We will call our first program GoVols and it will be a very simple one. We will print one line to the screen.
To print “Go Vols”, we use System.out.println("Go Vols"); and we can substitute “Go Vols” with any other phrase in quotes to print that out as well. To print “Rocky Top”, we would write System.out.println("Rocky Top");
Using print vs println is an important distinction - be sure to read that in your online textbook.
We place the print line, indented, inside the two sets of curly braces on it’s own line. Your end result should look like this:
class GoVols {
    public static void main(String[] args) {
        System.out.println("Go Vols");
    }
}
Running the Program
Lastly, we need to run the program to see our output put to the screen, as expected. If you have VS Code running correctly, you should see a “Run” button beneath the class name, and a play button on the far right. If you do not see these buttons, many times closing the file within VS Code (remember to save), closing VS Code itself, and then opening it again will do the trick.
Press either the Run button or the play button.

After running the program, you should see your output in the “Terminal” tab.

All of the output before the “Go Vols” - the stuff that looks pretty random - is the command that VS Code is running to get your program going. You can ignore that. If you have any errors, they will show up here instead of “Go Vols”. You can also see a 1 next to problems - VS Code is upset this isn’t a “project file”. That is absolutely what we want, so seeing the “problem” is normal.
Congratulations - you’ve written and run your first Java program!