The Unix Operating System
An operating system is the underlying program controlling the basic functionality of the computer. Most everyone is probably familiar with the two most popular commerical operating systems in the world - Windows and MacOS (we also use operating systems on our phones - Android and iOS).
In this class, we will learn about another operating system - Linux. Linux is based off of the Unix operating system, an invention from Bell Labs (AT&T precusor). Unix was the first operating system written in a “high level” programming language - the C language (high level compared to assembly language that is). You might hear Unix and Linux used interchangeablely in conversation, but Unix was the original Bell Labs invention, and Linux is the derivation we use today. Linux has continued its popularity today, one reason being it is an open source software (i.e. free to use). The Macinosh operating system (MacOS) is even an underlying Linux sytem.
For history on Unix/Linux, you can read HERE and HERE.
The Hydra and Tesla machines (the computer you use in your lab sections) run on Red Hat, a version of Linux made by Red Hat Inc. (an IBM subsidiary).
Interfaces
One of the aspects that makes a Linux system compelling is the command line interface. What is the command line interface? First, let’s talk about another interface you are more familiar with, so you can understand the differences.
Graphical User Interface
With Mac and Windows computers, we interact with the operating systems using graphics. If you want to open a folder that contains your lab files, you use a touchpad or mouse to move a cursor and click on an icon with a folder image. If you want to open Firefox (the internet browser), you click on a fox image. The use of a cursor and images to navigate an operating system is so intuitive at this point you may not think about it anymore, but interacting with a computer in this way is because the operating system is using a graphical user interface. Graphics being the key word here.
Command Line Interface
While most modern Linux systems do have a graphical user interface that you’ll see in your lab, the operating system remains popular due to it’s command line interface. Instead of using a cursor and clicking on graphics to navigate your system, you instead type commands on what we call the “command line”. You may have seen this in movies, like Tron or Jurassic Park. It’s often depicted as a big black box (and often looks like that in real life too).
Clip from the movie Tron with Unix commands
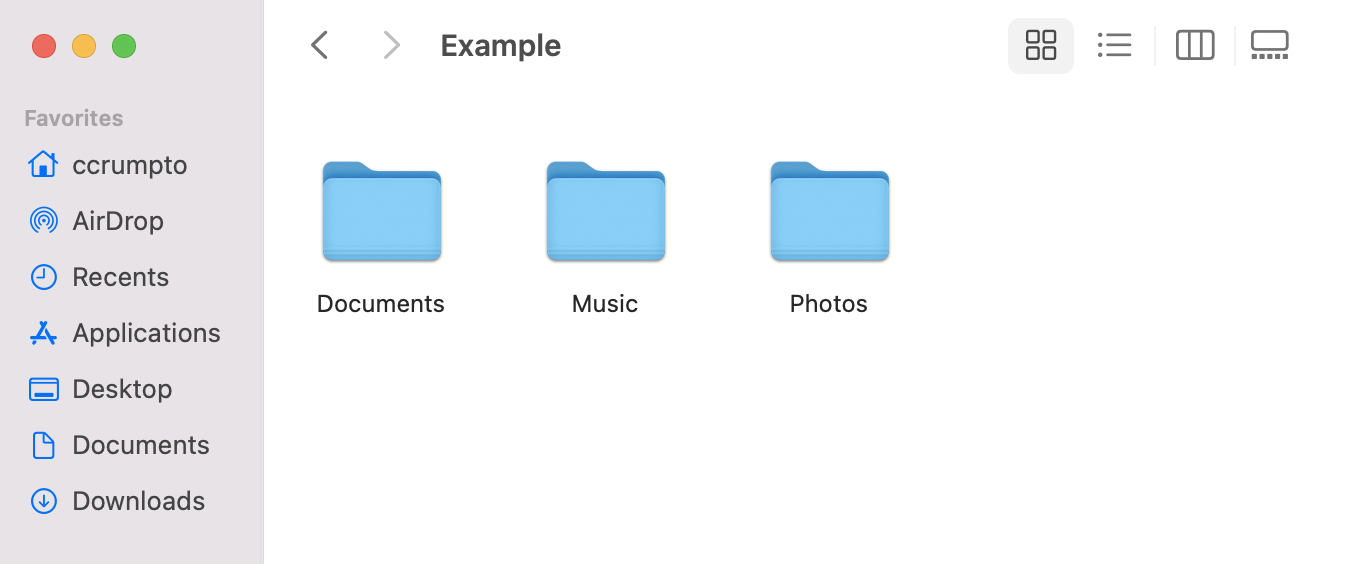
Instead of clicking on a folder called “Documents” to open a file, you would type “cd Documents” to change the directory to Documents. For example, on a Mac, I would use the Finder as shown below to navigate:
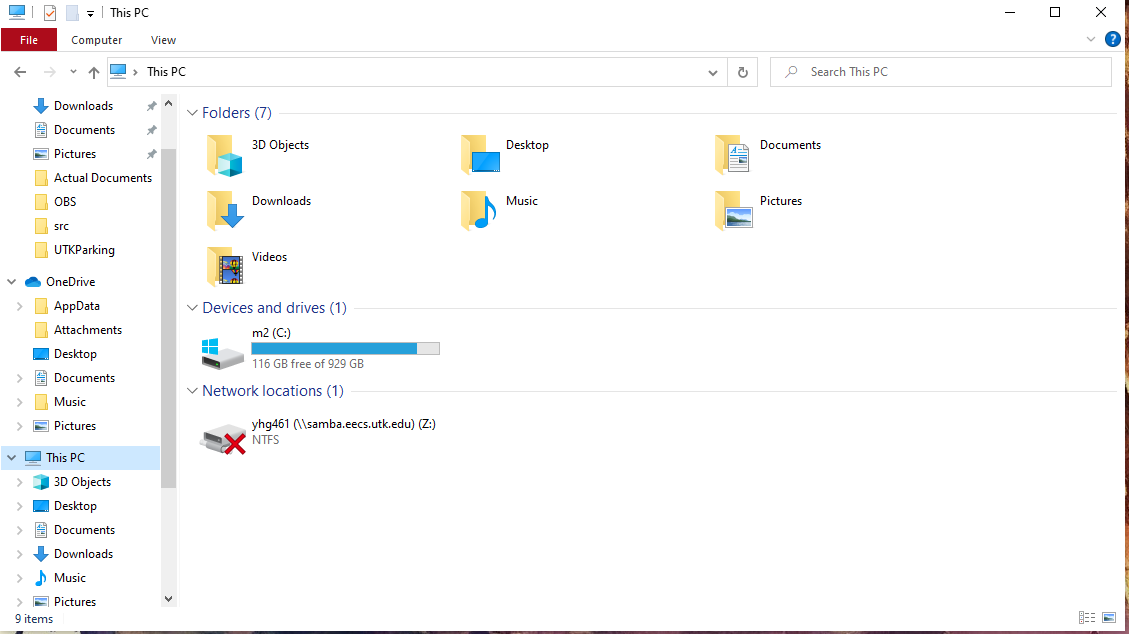
And on a PC, I would use the File Explorer:
With the command line, again I would just type cd Documents if I’m in a folder that contains Documents. (I’ll cover what ccrumpto@CrumptonLaptop:~$ means in the next section).
ccrumpto@CrumptonLaptop:~$ cd Documents
You might be asking, how do I get to this place where I can type in commands? That’s exactly what we will cover next.
How to Access the Command Line Interface
Accessing the command line will be different if you are working on a PC versus a Mac. During the first lab section, the TAs will work with everyone to verify you have your computer setup to access a command line interface. If you have a Mac, it’s fairly easy because MacOS is built on top of Linux. Go to your Launchpad and search for the “Terminal” program. With PCs, Windows 10 and beyond thankfully has integrated what’s called WSL (Windows Subsystem for Linux).
Command Line Prompt
When you open up a terminal window, you will be faced with a string of text and a blinking cursor. What is this, and what does it mean?
ccrumpto@CrumptonLaptop:~$
This is called the “command line prompt”. A “prompt” in general is a request for data. We prompt the user for data all the time in our programs when we use an output statement asking for information. In this case, the prompt is waitin for a command for us to type in, like cd Documents above.
The string of text that is the prompt contains information about our system:
ccrumpto is my username for my computer.
CrumptonLaptop is the name of my machine.
@ separates my username from my machine name.
: denotes that after this symbols, your current directory is shown.
~ is shorthand for my home directory. If I was currently in Programs, then Programs would be shown instead. Most machines just show the current (i.e. “working directory”) directory by default, but some systems like Hydra/Tesla show the whole path from your home directory to your current directory, like ~/cs102/Programs. You can change settings to your preferences.
$ is sign that the prompt has ended and you can begin typing. Depending on your shell (terminal program) and what type of account you are logged into, you may see a different symbol like > or # or %. Regardless, it’s pretty obvious where the prompt ends because that’s where you cursor is blinking.
Different versions of the command line will be slightly different, but in general you’ll see something like username@machinename:path$.
Commands to Know
We will learn a handful of commands in this class. The following are ones you should know for directory navigation and file management:
| Command | Definition |
|---|---|
| ls | List contents of current directory |
| mkdir dirName | Make a directory called dirName (replace dirName with new directory name) |
| pwd | Prints the full path of the current directory |
| cd dirName | Changes directory to dirName (replace dirName with destination directory) |
| rm fileName | Deletes the file called fileName. THIS PERMANENTLY DELETES THE FILE. It does NOT move it to trash! |
| whoami | Prints user’s username |
| clear | Clears screen |
| cp file1 file2 | Copies file1 to a new file named file2 |
| mv SOURCE DESTINATION | There are two ways to use the “mv” command! (Move) One re-names SOURCE to the new name DESTINATION. This can be used to rename files or directories. |
| mv SOURCE DESTINATION | There are two ways to use the “mv” command! (Move) One movesSOURCE into an already existing DESTINATION. This can be used to move a file into a directory, or a directory into another directory. |
| rmdir dirName | This deletes the directory called dirName. The directory must be empty before it’s deleted. |
Absolute vs Relative Path
With many of these commands, you can write the path to the directory/file needed. The absolute path is the path from the root directory (very top directory) all the way to the directory/file. The absolute path will always begin with a forward slash. This first slash is the symbol for the root directory, and the slashes after that separate parent and child directories. /Users/ccrumpto/cs102/programs/lab1.cpp is the absolute path to this file called lab1.cpp.
The relative path starts at the current working directory instead of the root. For example, if I’m in the cs102 directory, then the relative path to lab1.cpp would be programs/lab1.cpp. Again note that we do not begin the relative path with a forward slash.
You can use paths with these commands. For example, if I’m in the ccrumpto directory and need to change to the programs directory, I can do
cd cs102/programs
and use the relative path to navigate there.
Example Task List
In order to understand how using commands works, I’ve written a task list of things I need to accompish using Unix, and the commands I will use to accomplish these tasks.
My task list:
- Make a directory called cs102 in the home directory

- Make a directory inside cs102 called labs

- Make a directory inside cs102 called examples

- Verify that all directories are empty (so I can use these in the future to store labs and examples)
How to accomplish these tasks in the Unix command line interface (assume we start in the home directory):
mkdir cs102
cd cs102
ls
mkdir labs
cd cs102
ls
cd ..
mkdir examples
cd examples
ls
cd ../..
Above, I use mkdir to make the directories, cd to change directories (two dots, .., means the parent directory), and ls to list the contents of the directory to verify that they are empty.
How We Will Program in CS102
Everything we’ve covered so far is just about navigating a new operating system using just the command line. We haven’t talked about coding up a program at all! That’s what we will cover next.
In COSC101, you all learned to code in Visual Studio Code - an IDE. (If you took an AP class or equivalent pre-req, you probably also learned on an IDE similar to VS Code). An IDE is an Integrated Developer Environment which essentially is an application that integrates a lot of tools to help you write a program. Some of the tools you used in CS101 were the run button, the debugger, and the terminal window to view our output.
In this class, we will expand the methods in which you can code. In conjunction with learning Unix, we are going to teach you a text editor called Vim.
Vim
Part of CS102 is learning to code without the fancy tools that an IDE like VS Code provides. Vim is a program that we use to code when using a command line interface. Since we don’t use a cursor/mouse in a command line interface, we can’t “click” on anything in Vim either. Vim is very simple, but very powerful - and some people learn to code faster when they learn all of Vim’s shortcuts. One large benefit these shortcuts and not using a cursor is the ability navigate around a file without lifting you hands from the keyboard. At first this feels bizarre, but the more practice you get with Vim, the more you will be accustomed to it.
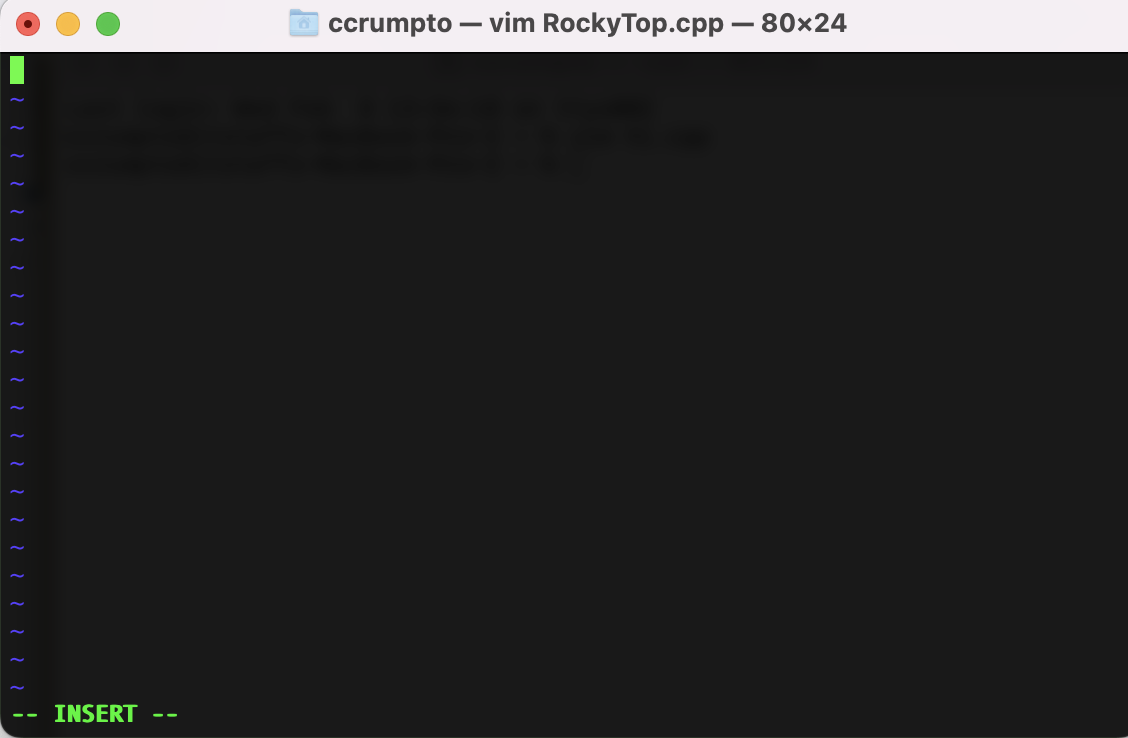
We open Vim on the command line when we either want to create a new file or edit an existing file. First, navigate to the directory you want the file to be stored in using cd [DirName] where you replace [DirName] with the name of the directory (see Command Line Interface section above for details). I want to make files in my Programs directory.
ccrumpto@CrumptonLaptop:~$ cd Programs
Next, I’m going to create a new file called RockyTop.cpp where I print out some verses from everyone’s favorite unofficial fight song.
ccrumpto@CrumptonLaptop:~$ vim RockyTop.cpp
After you hit enter to execute this command, you have a big blank screen open up. This is your blank file.
![]()
We are ready to start coding in Vim!
Vim Modes - The Basics
If you attempt to start write your code immediately on this blank screen - you’ll be a little confused that your text probably isn’t showing up. This is normal - you need to be in the correct mode.
Vim has two modes - normal mode and insert mode. When we open Vim, we start in normal mode. Normal mode allows you to do all sorts of tricks that we will drive deeper into shortly.
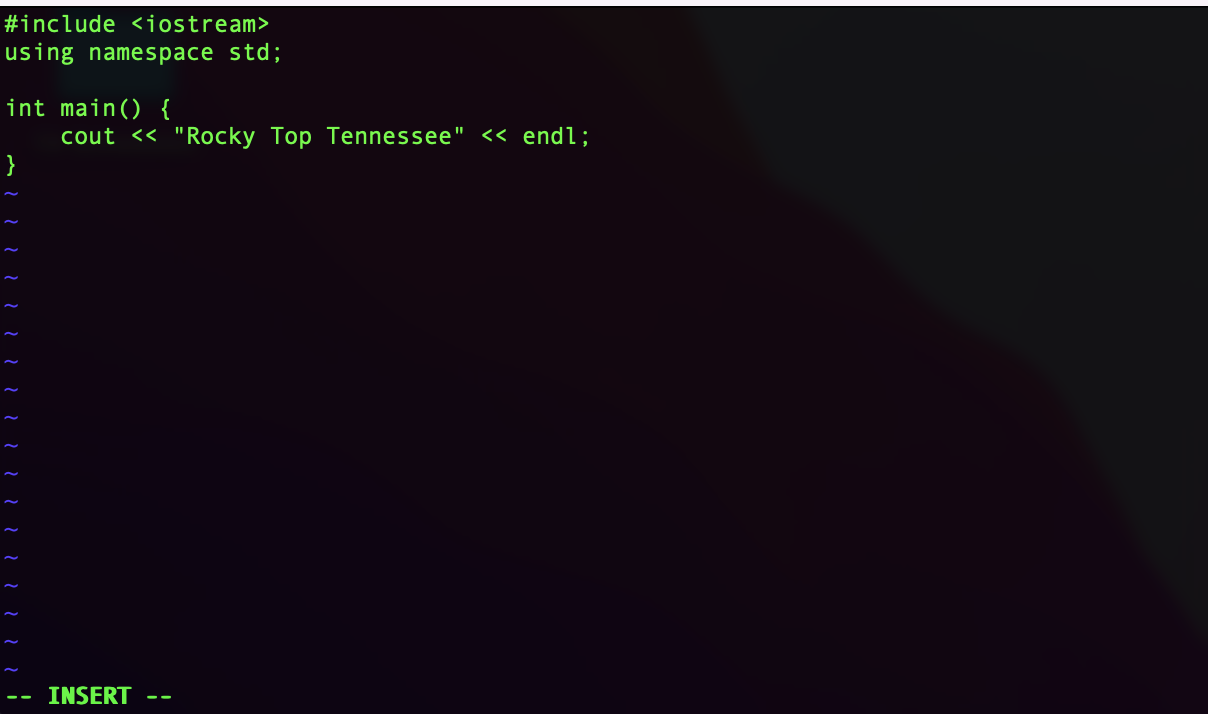
Press i to change into insert mode and you can begin to write a program. When I’m in insert mode, you will see INSERT in all caps at the bottom of your window.
Once you are in insert mode, you can begin typing. Again, remember you can’t use a mouse or cursor because you are working within a command line interface. Getting used to coding without that takes some adjustment. Unlike VS Code or other IDEs, Vim will not automaticaly type a closing brace when you type an open one, nor will it automatically indent or tab complete variable names.
Eventually, you will need to save your file. Vim does NOT automatically save your file, and if your computer dies or exit the shell (terminal), only the last version saved will be accessible. In order to save and/or quit Vim, first press esc (escape) to return to normal mode. Then type :wq to save (write) and quit Vim. Typing :w will save without quitting and :q will quit without saving.
The following chart is a summary of the bare-minimum commands to make a file in Vim:
| Command | Description |
|---|---|
| i | enter insert mode |
| esc | exit insert mode, enter normal mode |
| :w | Within normal mode, saves file |
| :wq | Within normal mode, saves file & exits Vim |
| :q! | Within normal mode, force quit Vim without saving |
Normal Mode Commands
Tricks and shortcuts you can learn in normal mode are the tools Vim provides to edit code very quickly once you learn how. These notes only cover normal mode in more detail, because insert mode doesn’t have any commands/shortcuts (it’s just made for explicitly writing your file).
Some helpful commands in normal mode are for file navigation - j, k, h, and l move the cursor down, up, left and right respectively. 0 (zero) jumps to the start of the current line, and $ jumps to the end of the line. gg goes the first line of the file, and G goes to the last line. None of the shortcuts edit the file itself, but you can pair these with other shortcuts to both navigate and edit quickly. For example, typing gg=G indents your program correctly from the first line to the last line.
Some commands that simply edit include r[char] which replaces the current character with [char], i.e. rc replaces the current character with a “c”. yy copies a line (y is short for “yank”) and p pastes the line. To copy the next 3 lines, you would type 3yy. dd deletes a line, and in the same manner, you would type 3dd to delete the next 3 lines. u will undo.
See the table below for some common Vim commands, including the ones above.
| Command | Description |
|---|---|
| j | down (i.e. arrow key) |
| k | up (i.e. arrow key) |
| h | left (i.e. arrow key) |
| l | right (i.e. arrow key) |
| gg | go to first line |
| G | go to last line |
| u | undo |
| yy | copy line |
| p | paste |
| x | delete character |
| dd | delete line |
| cc | delete line & go into insert mode |
| r [char] | replace with [char] |
| : [num] [enter] | go to line number |
To learn more, there are a variety of “Vim Cheat Sheets” online, including PDFs. HERE, HERE, and HERE are a few popular ones. Some people save a PDF version as one desktop image when they are learning for easy reference.
Click HERE for an interactive Vim Tutorial to practice your Vim skills.